


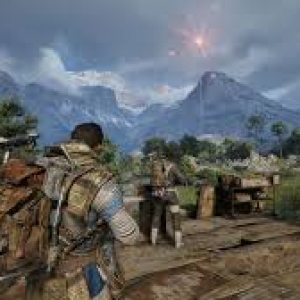


Astra Malorum's the one BO7 map that keeps pulling me back in, even after a bunch of messy attempts. Since the early December drop and the 115 Day rush calming down, it finally feels playable enough to chase the full quest without the game melting mid-step, and I've even used a CoD BO7 Bot Lobby run now and then to practice routes and timing without wasting a whole night. The setting does a lot of the work too: that skull-rock drifting near Saturn, the dead quiet between rounds, and then a sudden wave that hits like a train. If you're going for the Caltheris cutscene, you can't just freestyle it and hope it clicks.
Loadout Choices That Actually Help
People love bringing shotguns because they feel strong, but you'll notice the wheels come off once you need points fast and constant crowd control. I've had the cleanest starts with the Maddox RFB or Kogot-7, mainly for the fire rate and how quickly they farm money for Pack-a-Punch. Aether Shroud isn't a "save me" button here—it's a tool. You'll want it later when you're hauling gear and moving like you're stuck in mud. Also, the Combat Goblin is the underrated pick. I tried the Support option, and yeah, it sounds smarter on paper, but the Combat one pulls aggro at the right moments and buys you breathing room during the symbol-heavy steps.
When To Start The Quest
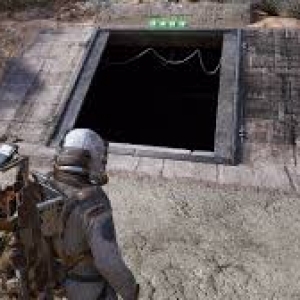
I don't touch the mainline steps until I'm set up, usually around round 20. Earlier than that, you're just one mistake away from a wipe. The Observatory Dome is where it starts feeling real: you hit the Harmonic Oculus, lock the area down, and now you've got OSCAR lobbing those UFO-style shots while you're trying to keep a lane clear. Once you've got a PaP weapon, shooting one down isn't the hard part—it's staying calm and not over-rotating. The LGM-1 Wonder Weapon is the bigger deal. Build it, then upgrade it. The upgraded version turns the later combat phases from a slog into something you can actually manage without burning every resource.
Telescope, Coordinates, And The Gross Escort
The telescope alignment is the step that makes teams tilt. You'll be matching the crosshair to planets and it can feel floaty, like your aim's fighting you. If it starts drifting, back out and hop back in; it often snaps back to normal and saves a full reset. Once you've got coordinates and punch them into Machina Astralis, you're in the "why is this in the game" section: brain extraction with the Rock Saw, then the Perfusion Machine escort. This is where solo runs live or die. Pop Aether Shroud, move with a plan, and don't pretend you can tank a full horde while carrying something that heavy.
Beating Caltheris Without Losing Your Mind
Caltheris is a marathon fight, with fragments swarming and OSCAR interference making every mistake feel twice as expensive. Keep rotating, don't get cornered, and treat PHD Flopper like your insurance when the ground pounds start chaining. If you're gearing up and don't want the grind to eat your whole week, it's worth knowing places like RSVSR exist for picking up game currency or items so you can focus on learning the patterns instead of running the same setup loop again and again, because the win comes from repetition and clean movement, not hero plays at the end.